
CJ’s Quick Homemade Frijoles (Beans)
When it comes to food, sometimes I take the easy route and go with pre-packaged stuff. When I found Taco Bell Home Originals – Fat Free Refried Beans, I had a product I could really sink my teeth into. Unfortunately (as you’ll see from that post’s comments), it’s all but disappeared. Yeah, there still pockets here or there, and you can order a case via Amazon (though the shipping can be a killer), but I know when it’s time to throw in the towel. It was back to making beans at home.
For the most part, making beans at home isn’t that big of a deal. My wise and native New Mexico grandma made a batch of beans just about every day. Thing is, if you want your beans refrito or “well fried” (often mis-translated as re-fried, but can also mean “well-cooked”), then it takes a bit more effort. For most people, this task is just one more step: put beans and bean liquid in an oiled skillet, mash, and cooked ’til done. I used to do it this way myself. Unfortunately, time has ravaged my shoulder and even this simple task is physically challenging for me.
With the Taco Bell beans unavailable, and me wanting frijoles refritos, I needed to come up with an altered procedure. Enter the [amazon_link id=”B00008GSA3″ target=”_blank” container=”” container_class=”” ]immersion (or stick) blender[/amazon_link]. A tool that is a godsend for my shoulder.
The recipe below is very simple…almost plain. I wanted beans that were no-added-fat, so no frying. I also wanted to rely on the natural flavor of the beans instead of some spice mix, so the seasoning is, basically, salt. You are certainly free to add additional seasonings as you like, but this serves as a solid foundation upon which to let your imagination build.
CJ’s Quick Homemade FrijolesMakes about 8 cups |
|
|---|---|
| Ingredients: 3 cups dried pinto beans 7 cups water 2 Tbl Kosher salt (about 4 tsp table salt) |
|
|
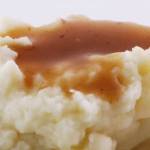
You can find dried pinto beans in most grocery and warehouse stores, though this can vary by region. You’ll notice that bags of pinto beans can be found in various shades from a latte-light tan to a mahogany-deep brown. Darker beans often seem to be older, but that isn’t a hard-and-fast rule. Darker been can have a more “robust” taste that can either taste deliciously “complex” or old and leathery. Personal preference. Being pinto beans, however, they will be speckled with darker flecks. You need to sort your beans. This means dumping your 3 cups of dried beans on a clean surface and going through them thoroughly to remove any stones, which in some brands are numerous. You’ll also want to remove beans that are broken and have significant breaks in their skin. My grandma told me that you’re safer with undamaged beans, and who am I to question her wisdom? Once the beans are sorted, they need to be rinsed. You’ll find some bags of beans are incredibly clean. Others are so dirty that the water is almost like mud during the first rinse. In any case, you want to rinse your beans until the rinse water is clear. I find that three rinses with some hand agitation is usually all I need — so I do it even with very clean beans. Because I hate wasting a lot of time with beans, I use a [amazon_link id=”B00006ISG3″ target=”_blank” container=”” container_class=”” ]6-qt pressure cooker[/amazon_link] to speed things along. I find that if you cook beans at pressure long enough, you end up with less of a potential flatulence problem than with overnight soaking. The major plus: no overnight soaking. Just toss your sorted and rinsed beans into the pressure cooker and add your water. I suggested 7 cups of water in the ingredients, but this is very approximate. I fill my pressure cooker just a little beyond the manufacturer’s recommendations because I want to ensure I have enough liquid after the beans cook, and I know that I can get away with it with my set up. You should follow your pressure cooker’s instructions if for no other reason than safety. I seal up my pressure cooker and put it on the stove on high heat to bring it up to pressure quickly. Once it’s at pressure, lower the heat to the recommended setting for your cooker and let it go for 1-hour. (I’m at 1-mile altitude, if you are between sea level and 3,000 feet, use 55 minutes; at 4000 feet: 58 minutes.) After the hour, quick-release the pressure in the manner suggested for your cooker (mine has me run cold water on the lid) until it’s safe to open. Once the lid is off, you should see cooked beans—with no trace of speckling—and a fair amount of liquid. In fact, because of where we’re going with it, the beans are actually a little over-cooked and have a creamy texture. If the liquid as at the level of the beans or a little below, add just enough hot water to be 1/2-to-1 inch above the top of the beans. Add the salt. Actually, I’d suggest adding a bit less than what I recommend at first and then adjust to taste. You don’t want the liquid to taste salty (a flavor that ruins most canned beans), but neither do you want the beans to be bland and lifeless. Err on the side of not having enough salt. You can always add more later. At this point, I also add about a 1/2 teaspoon of [amazon_link id=”B0056D3MR4″ target=”_blank” container=”” container_class=”” ]vegetarian bacon chips[/amazon_link]. This isn’t required, but since my grandma used to fry the beans in bacon grease, it helps tweak the flavor closer to what I remember. So as not to scratch up my pressure cooker, I transfer the beans to a bowl with just enough cooking liquid to cover them. (If you were “re-frying” them, this is where you’d instead transfer to an oiled pan to fry and mash.) I use my immersion blender, on high speed, to coarsely puree the beans (about 10 seconds). Because I’m not frying, many would call this a bean dip, but that tends to be more pureed than I suggest if you’re aiming at a refried bean texture. After a quick stir to make sure all the liquid is incorporated, the beans are done. Because it’s still hot, the beans should be rather fluid and pourable. As you can see from the last photo, there are still a few bean pieces visible…not unlike refried beans. Don’t worry that the mixture is so loose. As it cools, it will thicken to the consistency you often find in canned beans. Experience will help you fine-tune how much liquid to use before blending to get the final thickness you want. As I said, this is a very basic recipe that is based on the simple, authentic flavors I grew up with but tweaked for speed and vegetarian (and vegan) considerations. Enjoy. |
         |


Leave a Reply